

Collecting website feedback is a natural part of improving the digital customer experience. It helps you understand what visitors are experiencing while they are still on your website, instead of relying only on assumptions or numbers in analytics reports. But how do you actually get started? In this blog we’ll show you how to get up and running with your website feedback programme today.
There are different ways to collect website feedback. Some businesses choose to develop their own feedback solution in-house, while others use an external provider. In many cases, the second option is the more practical one, especially for teams that want to get started quickly.
Website feedback helps you understand what visitors are experiencing while they are still on your site. Analytics can show where people drop off, which pages underperform or how long they stay, but they do not always explain why. A feedback form helps close that gap by giving visitors a direct way to tell you what is confusing, what is missing or what is getting in the way.
For the purpose of this guide, we will show you how to build and publish a website feedback form with Mopinion. If you would like to follow along, you can sign up for Mopinion’s 14-day free trial. There are no strings attached and no payment details required.
TL;DR – Article summary
Adding a feedback form to your website with Mopinion is a practical way to collect in-the-moment feedback from visitors and understand where they experience friction, how satisfied they are, how easy it was to complete a task and whether they achieved their goal. In this guide, we walk through the full setup process step by step, from choosing the right form type, such as CSAT, CES or GCR and building your questions, to customising the design, previewing the form, creating a deployment, installing the deployment code, setting condition sets, testing everything with the Deployment Assistant and publishing the form on your website.
In this guide, we will explore:
- Why add a feedback form to your website?
- Questions to ask in your website feedback form
- Tips for making your website feedback form a success
- How to add a feedback form to your website
- Start building your website feedback forms
Why add a feedback form to your website?
Adding a feedback form to your website gives visitors a simple way to share their experience while they are still in the moment. Instead of guessing why someone is frustrated, struggling to complete a task or leaving a page, you can ask them directly.
That is what makes website feedback so valuable. It adds context to what you are already seeing in your analytics tools. For example, analytics might show that visitors are abandoning a page quickly, but feedback can reveal whether the issue is unclear content, poor navigation, missing information or a technical problem.
A website feedback form can help you:
- identify friction in the digital journey
- collect feedback on specific pages or flows
- measure satisfaction with the website experience
- understand whether visitors achieved their goal
- detect bugs, broken journeys or confusing design elements
It is also a flexible method. You can make the form available across your whole site through a feedback button, or show it only on specific pages, after a certain amount of time, on exit intent or when a visitor reaches a specific point in their journey.
So where do you start? By first deciding what you want to ask and why!
Questions to ask in your website feedback form
The questions you add to your website feedback form should depend on your goal. Are you trying to measure satisfaction with the overall website experience? Do you want to understand how easy it was for visitors to complete a task? Or are you trying to find out whether they achieved what they came to do?
Here are a few examples of questions you can ask in your website feedback forms.
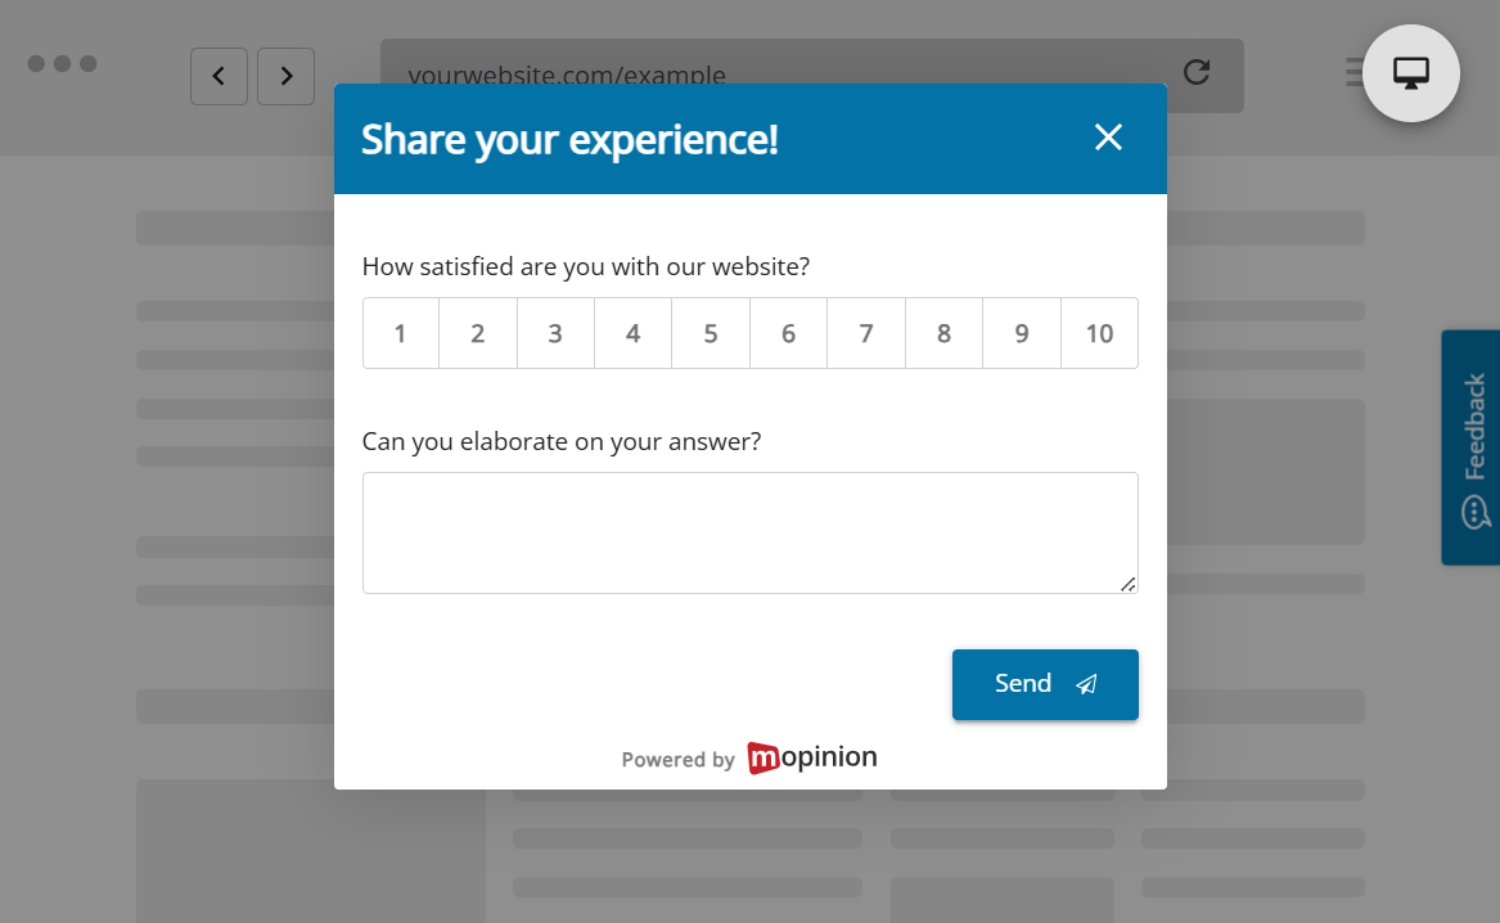
1. Customer Satisfaction Score
If you want to measure how satisfied visitors are with their experience on your website, a CSAT-style question is a strong place to start.
Examples:
- How satisfied are you with your experience on this website?
- How would you rate this page?
To add more context, it is useful to include an open follow-up question where visitors can explain their answer.
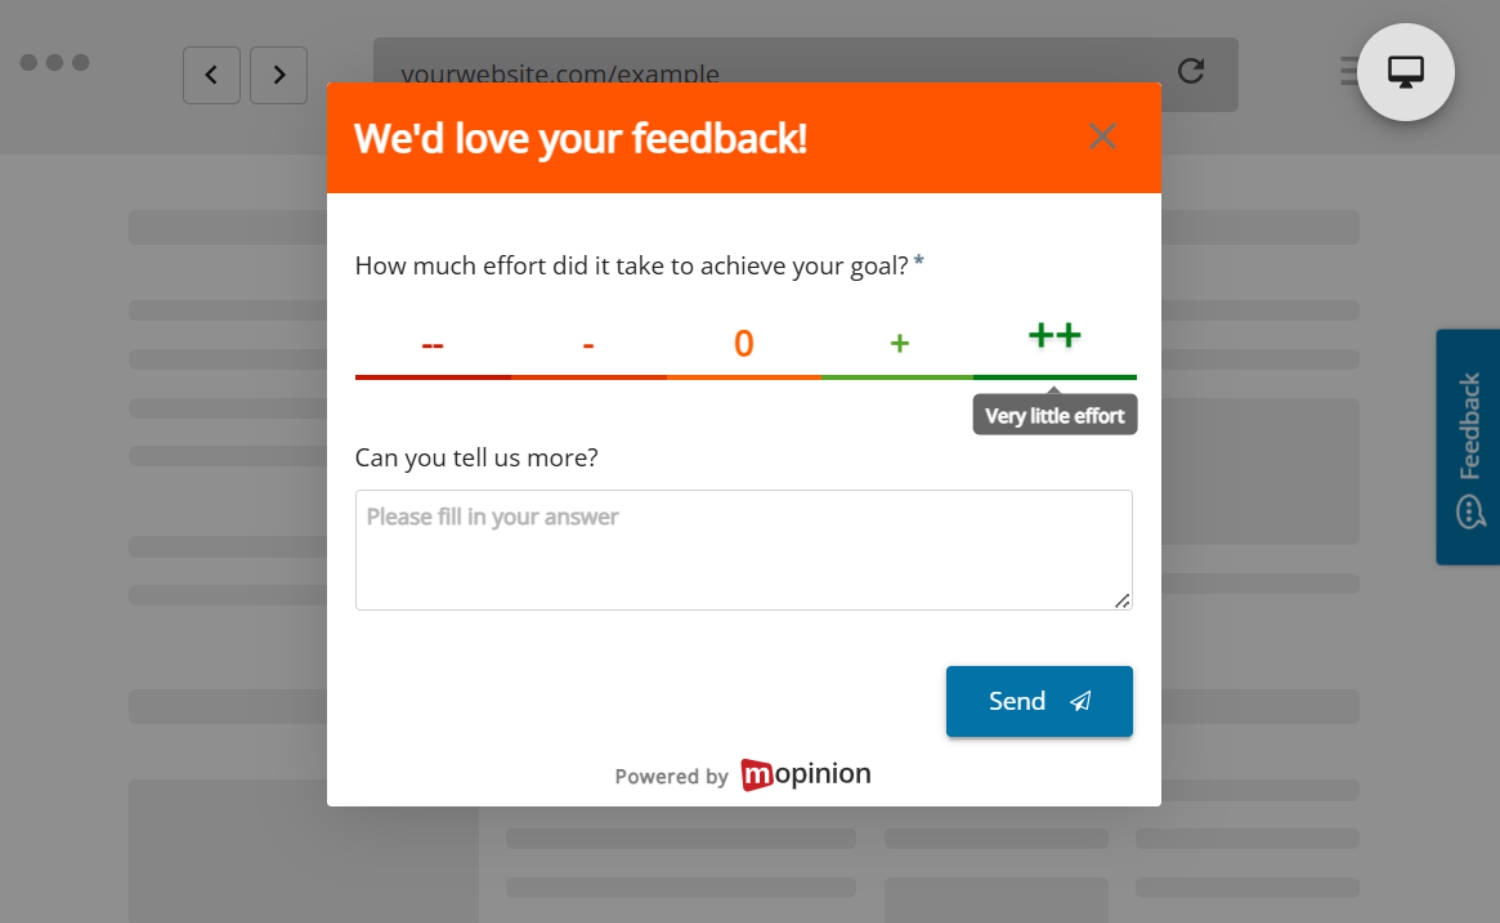
2. Customer Effort Score
If your goal is to understand how easy or difficult a process was, Customer Effort Score (CES) can help.
Examples:
- How easy was it to complete your task today?
- How much effort did it take to find what you were looking for?
This is especially useful on support pages, help centres, account areas or other task-based journeys.
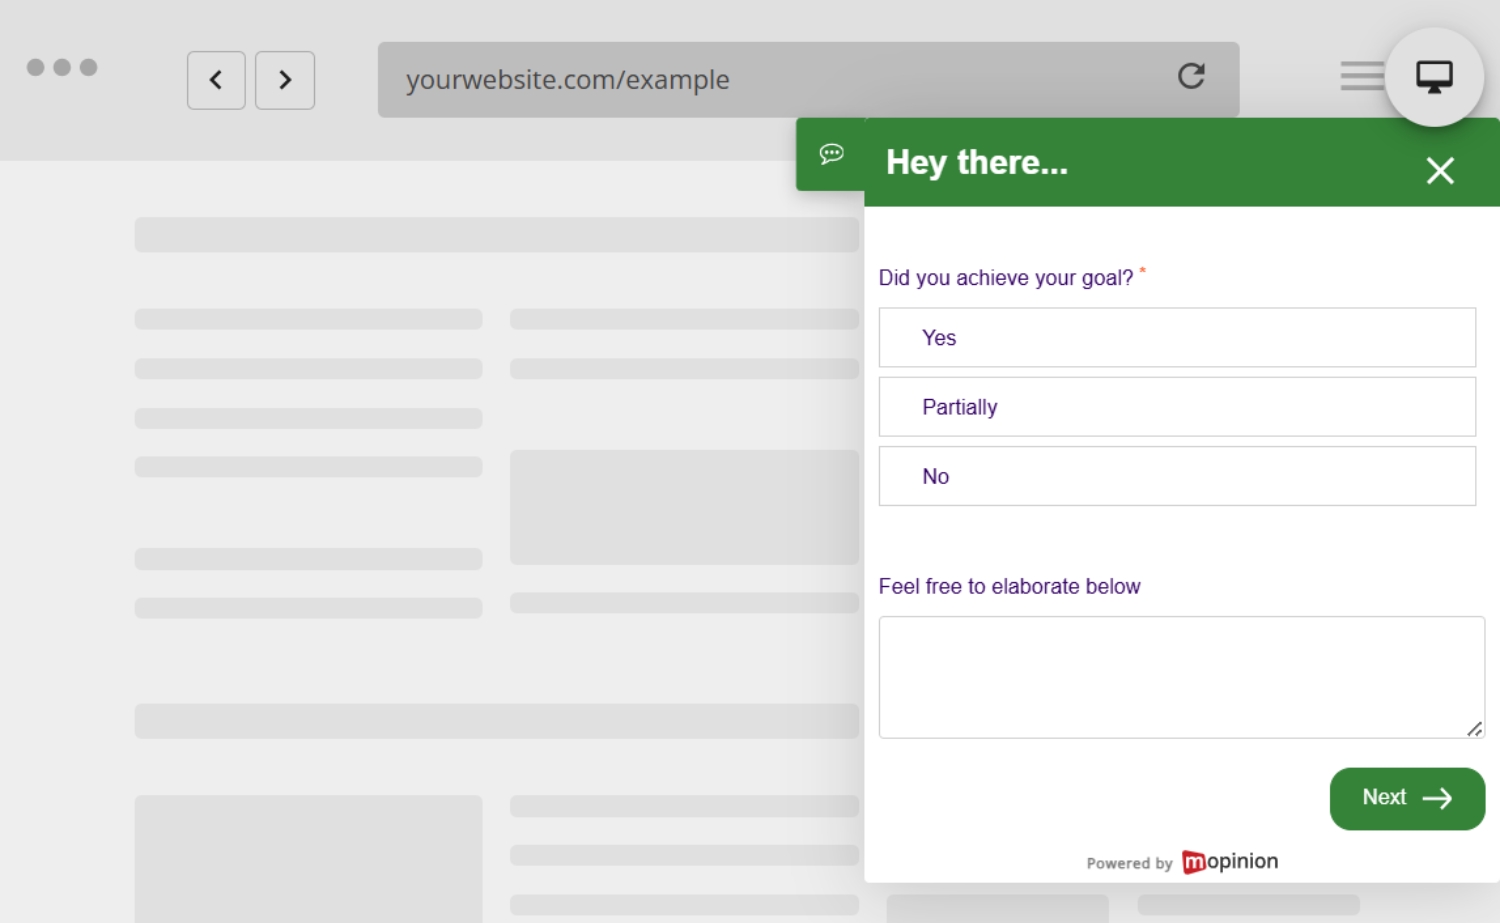
3. Goal Completion Rate
Goal Completion Rate (GCR) is useful when you want to know whether visitors actually achieved what they came to do on your website.
Examples:
- Did you achieve your goal today?
- Were you able to complete what you came here to do?
- If not, what stopped you?
This works well on pages where visitors are trying to download a resource, submit a form, find information or complete a request.
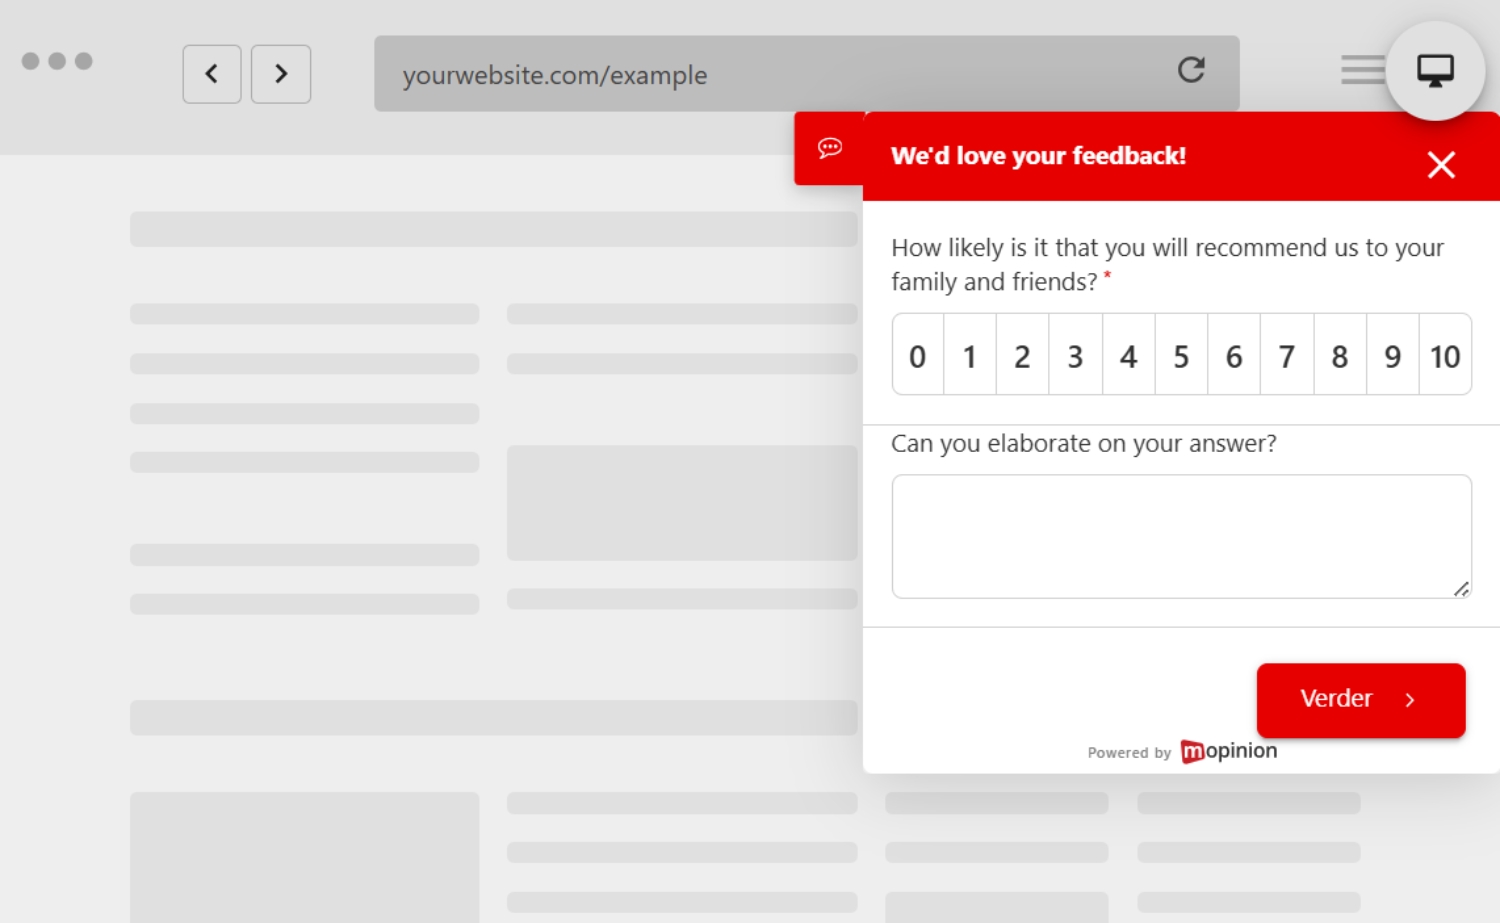
4. Net Promoter Score
Depending on the journey, you may also want to measure loyalty or recommendation intent through NPS.
Example:
- How likely are you to recommend our website to others?
This type of question is most useful after a more meaningful interaction or journey on the site.
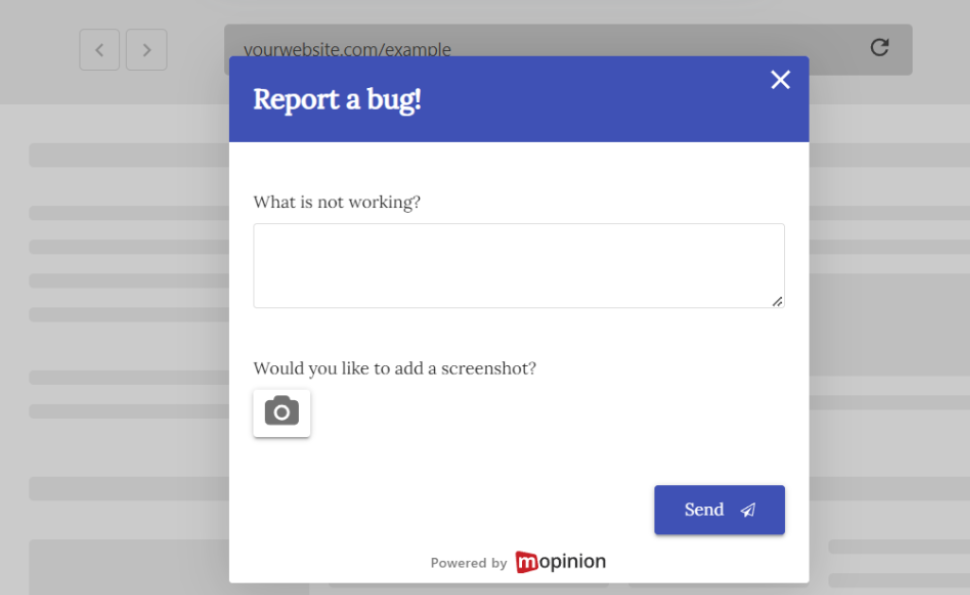
5. Visual feedback
If you want to make it easier for visitors to point out bugs, unclear elements or design issues, screenshot-based visual feedback can be very useful. This allows visitors to show exactly what they are referring to, which often makes it easier for teams to identify and fix issues faster.
For this guide, we are using a simple general website feedback form with a CSAT-style question and an open comment field. This is a good starting point because it gives you both a quick rating and qualitative context on what could be improved.
A simple example setup could look like this:
- How would you rate your experience on this website?
- What could we improve?
These are just examples of how you can phrase your questions in website feedback forms. The most important thing is to choose the setup that best matches your goal.
Tips for making your website feedback form a success
Before you start building your website feedback form, there are a few important things to keep in mind.
1. Make sure your form is aligned with your goal
As with any type of survey, it is important to decide what you want to learn first. Whether that is measuring satisfaction, identifying friction, understanding task completion or collecting bug reports, every feedback form should have a clear purpose.
Starting with one clear goal will help you choose the right question type and create a form that gives you more useful insights.
2. Keep your form short and focused
The main goal with website feedback forms is to make them easy for visitors to complete. It should feel quick and effortless.
That means your form should include questions that are clear, relevant and to the point. In many cases, one score question followed by one open comment field is already enough to collect useful feedback.
It is also a good idea to include an open comment field, as this gives visitors the chance to explain their answer in their own words and helps you understand the reason behind the score.
3. Think carefully about when and where the form should appear
A feedback form is only useful if it appears at the right moment. Before setting it live, think about whether it should appear across all pages, only on specific pages, after a certain amount of time, on exit intent or only when a visitor clicks a feedback button.
This has a big impact on how relevant and helpful the form feels.
4. Preview the form before adding it to a deployment
It makes more sense to preview your form while you are still designing it, before moving into the deployment stage. That way, you can check the wording, question flow, logic and branding early and make changes before configuring how the form will appear on your website.
Alright, let’s get to it!
How to add a feedback form to your website
For illustrative purposes, we will walk you through how to create and publish a website feedback form with Mopinion.
For this example, we are going to create a general website feedback form in Mopinion, triggered by a feedback button that appears across all pages of the website. This is a useful starting point for teams that want to collect broad feedback and identify friction across the digital journey.
We are using a CSAT-style question followed by an open comment field because this is one of the simplest and most effective ways to collect general website feedback. It gives you both a quick satisfaction score and qualitative context on what could be improved.
Before you begin, it helps to understand that there are two parts involved in this setup. The first is the feedback form itself, meaning the survey your visitors will fill in. The second is the deployment, which controls how, where and to whom that form is shown on your website.
1. Create your feedback form
First, you need to build the feedback form itself.
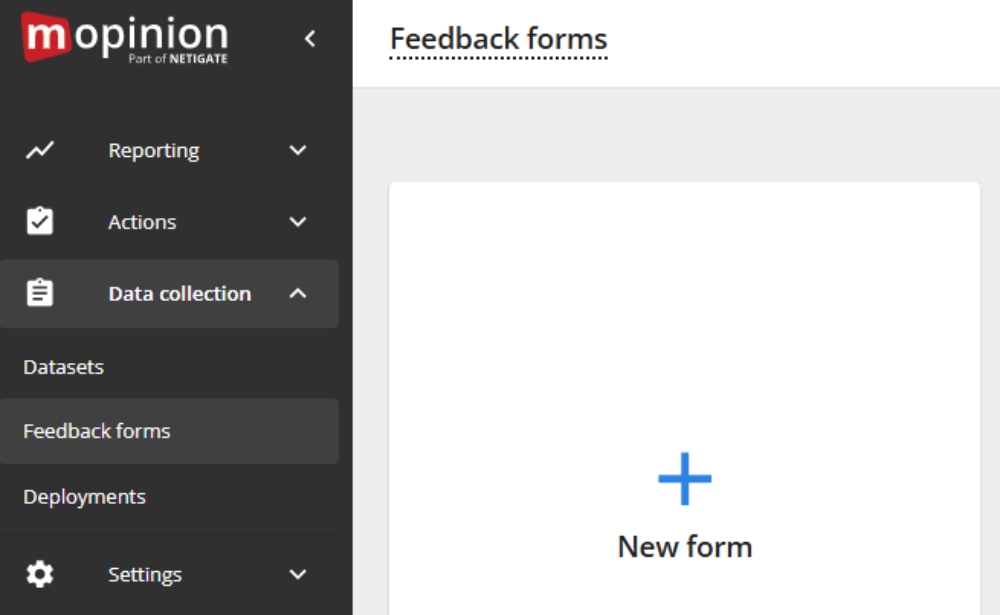
In Mopinion, go to the menu on the left-hand side and under ‘Data collection’, click ‘Feedback forms’. Then click to create a new form.
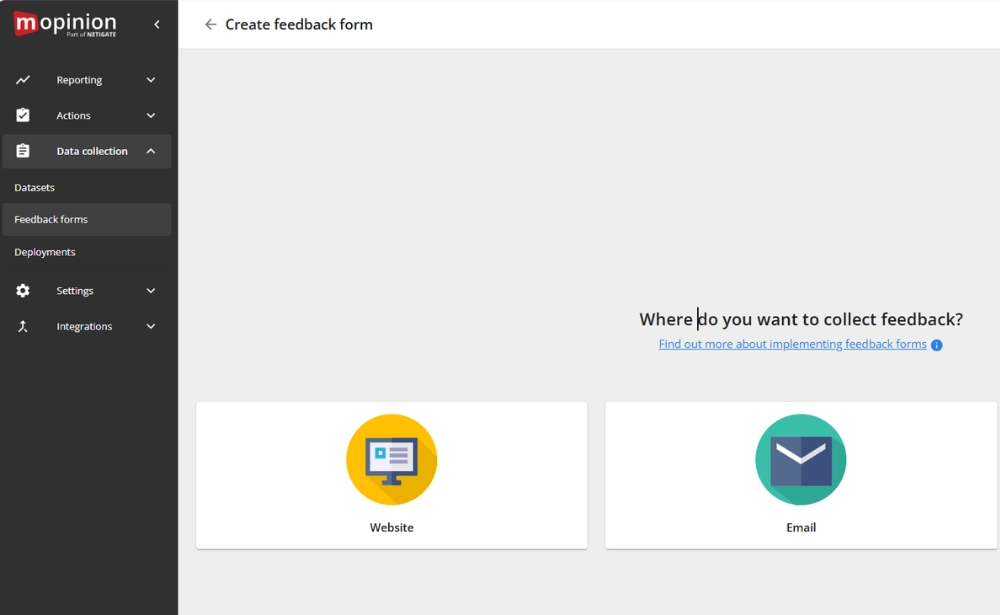
Next, choose ‘Website’ as the channel. Mopinion will then ask how you want to collect feedback.
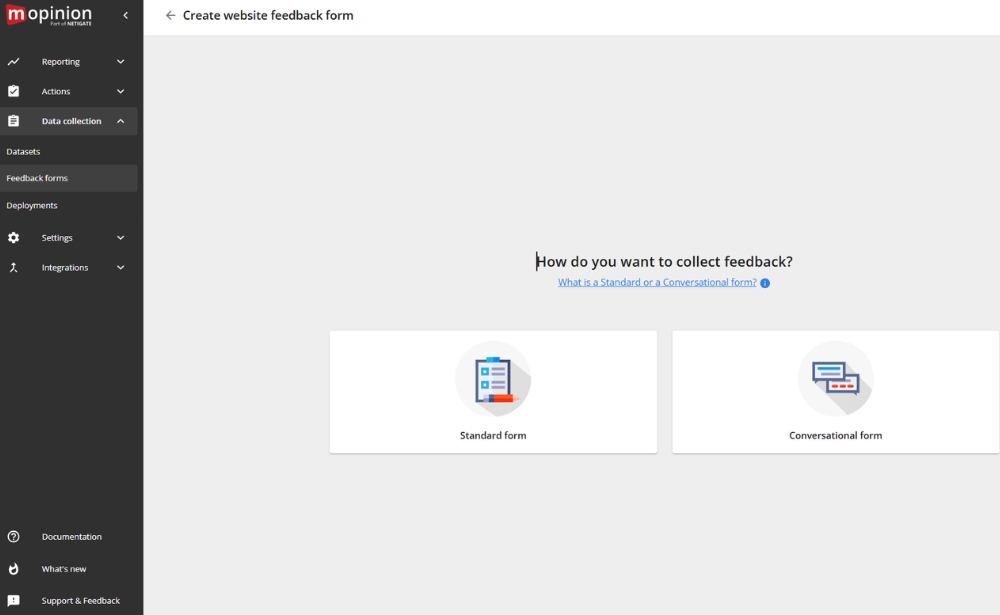
Here, you can choose between a ‘Standard form’ and a ‘Conversational form’.
A Standard form follows a more traditional survey layout, showing the questions in a clear and structured way. A Conversational form presents the questions one by one in a more interactive, chat-like format.
For this guide, we will choose Standard form, as it is the most straightforward option for creating a classic website feedback form.
Before building the form, it is helpful to decide what you want to learn. For example, do you want to:
- collect general website feedback
- identify bugs or technical issues
- understand why users drop off
- gather feedback on a specific page
- measure satisfaction after an interaction
For this guide, we are keeping it broad and creating a general website feedback form that can be accessed across the site through a feedback button.
2. Add the questions to your form
Now that you have created the form, the next step is to add the questions visitors will answer.
For this example, we want to include:
- a CSAT-style question
- an open comment question
To add these, go to the ‘Add’ tab in the menu on the right-hand side of the form builder. There, you will see the different question types available. Find the question types you want and drag them into your form.
First, drag in a Customer Satisfaction Score question. For this example, we are using smiley ratings. Then drag in an Open question underneath it so visitors can explain their answer in their own words.
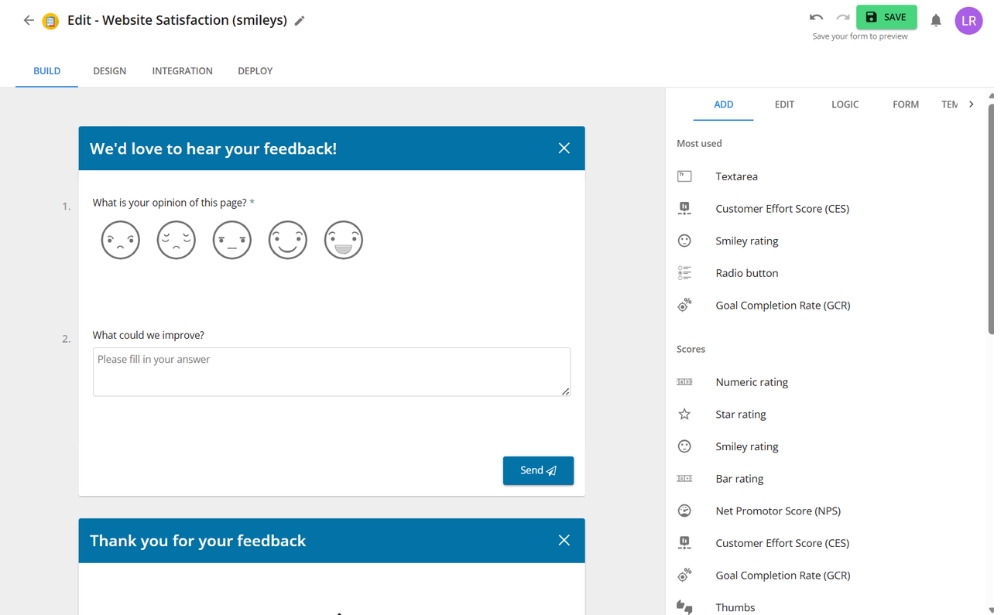
A simple setup could look like this:
- How would you rate your experience on this website?
- What could we improve?
This works well for a general website feedback form because it combines a quick rating with qualitative context. It keeps the form easy to complete while still giving your team something useful to act on.
If you want to experiment further, you could also try:
- a CES form asking how easy it was to complete a task
- a GCR form asking whether the visitor achieved their goal
That can help you understand which setup best suits your use case.
3. Add question logic
Once your main questions are in place, you can add question logic to make the form more relevant.
Question logic allows you to show certain follow-up questions only when a visitor gives a specific answer. For example, if someone gives a low score, you might show a follow-up question asking what went wrong. If they give a more positive rating, you could ask what worked well or whether they found what they needed.
This helps you collect more useful feedback without showing every visitor the exact same questions.
How do I add question logic?
In the menu on the right, select ‘Logic’ and click on the question you want to add a logic rule to.
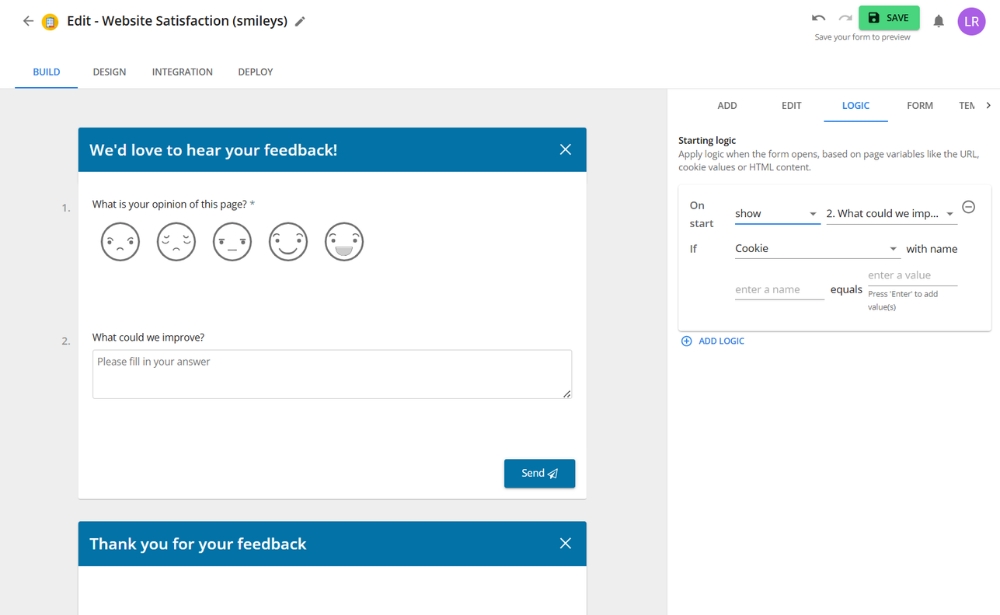
Now you can choose to hide or show a question or submit the form based on how a visitor interacted with the selected question.
For example, if you want to add a follow-up question asking for an improvement suggestion after a visitor has left a low CSAT score, you should first click on your CSAT question.
Next, under the ‘If’ section, you choose ‘is’ in the dropdown menu. Under ‘select values’ you choose which choices you want to trigger the question. For this example, we will choose ‘Hate’, ‘Dislike’ and ‘Neutral’.

In the ‘Then’ field, select ‘show’ in the first drop-down menu and then select your target, i.e. which question you want to be shown if the visitor fills in your selected values. For this example, it’d usually be an open question type, saying something along the lines of “We’re sorry to hear that. What would you improve about your experience?”
Voíla! That’s all there is to it. Of course, you can add any kind of question logic you’d like, so we recommend you play around with the options to get the form exactly the way you want it.
4. Customise the form
Now that you have the content of your form in place, it is time to customise the design.
Within Mopinion, you can adjust things like your colours, logo, branding and overall form styling so the feedback form feels like a natural part of your website.
Customising your feedback form
To edit the look and feel of your form, you first need to choose ‘Design’ at the top of the form builder. You’ll then be asked to choose a preset colour set (or ‘Theme’ as we call it in Mopinion) or create a new one.
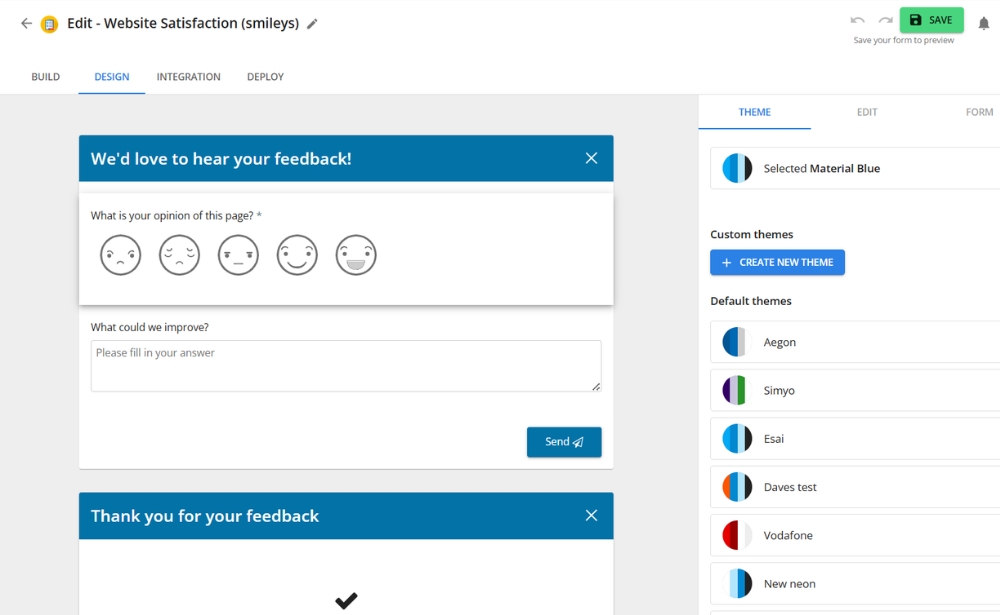
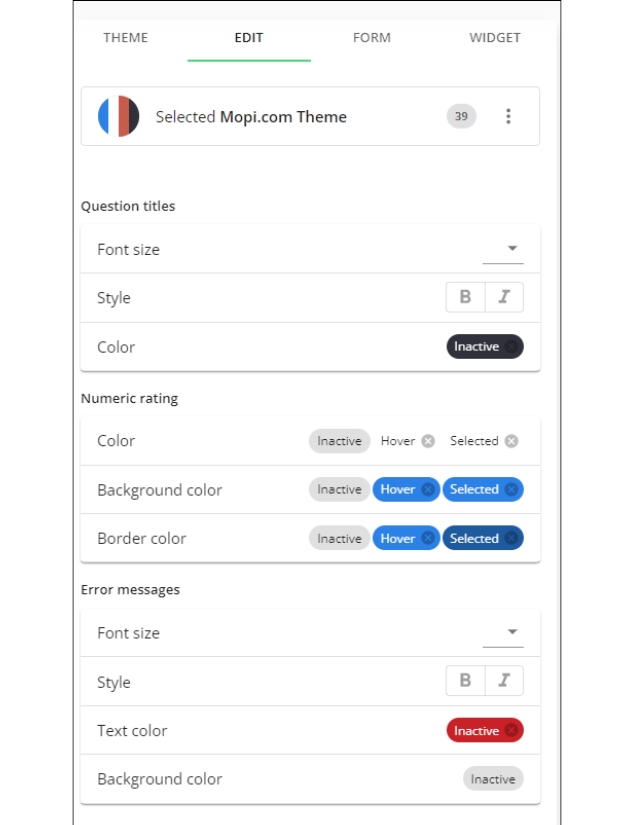
Once you’ve selected a theme or created a new one, you can edit the design. Click the element of your form that you’d like to edit. A logical place to start is the header. Here you can add a logo if you’d like, and you can also change the font size, style and colour, as well as the background colour of the banner.
For the sake of this example, we’ll just change the text colour and background colour. To do this, simply scroll down to ‘Text colour’, click ‘Inactive’ and choose the colour you’d like. To change the background colour, go to ‘Background colour’ and do the same.
If you’d like to change the colour or text of your ‘Send’ button, you can simply click it and do the same here.
Everything, down to how the questions are displayed, is editable, so click and play around with all the different options.
Customising your feedback button
For our example, a feedback button is the most logical choice because we want visitors to be able to open the form across all pages of the site. Under the ‘Form’ tab in the right-hand menu, you can choose where your feedback button will show on your website and if you’d like it to be shown as a label, attached to the sides of your website or as a floating, round button.
You’ll also find options like which text or icon to display on the button and the font size.
In this case, we’ll only edit the colour of the text and the button itself. To change the text colour, scroll down to ‘Colour’ and click ‘Inactive’ to choose the colour you’d like displayed on your button. If you want the text to be another colour when you are hovering over it, click ‘Hover’ and choose that here.
To change the background colour of the button, you simply scroll down to ‘Background colour’ and repeat the same steps.
5. Preview the form
Once you are happy with the content and design, click on ‘preview’ the form before moving on.
This is the best moment to check whether:
- the wording is clear
- the question flow makes sense
- the logic works properly
- the branding looks right
- the form feels polished on both desktop and mobile

6. Create a deployment
Once your form is ready, the next step is to create a deployment.
A deployment is the setup that controls how, where and to whom your feedback form is shown on your website. In other words, the form is the survey itself, while the deployment is the publishing setup behind it.
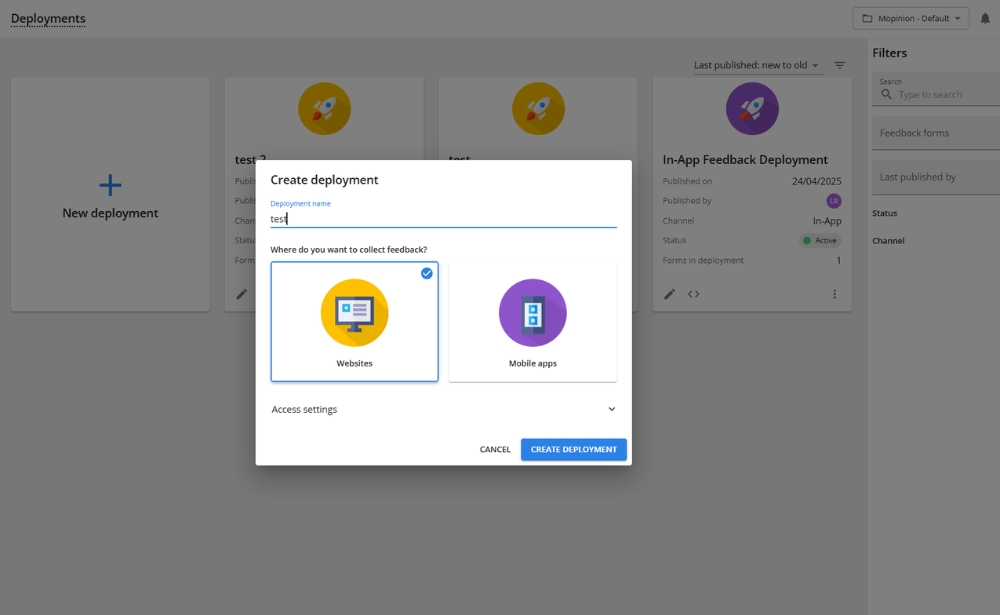
To create one, go to ‘Data collection’ in the left-hand menu and click ‘Deployments’. Then click ‘New deployment’, choose ‘Websites’ as the deployment type and give your deployment a name.
Once the deployment has been created, click into it to open the deployment settings.
7. Add your form to the deployment
Inside the deployment, click ‘Add form’ and choose the feedback form you want to publish on your website.
For this example, this should be the general website feedback form with the CSAT question and open comment field that you built earlier.
At this point, the two parts come together:
- the form is the survey your visitors will fill in
- the deployment controls how, where and when that form is shown on your website
Once the form has been added and saved, you can move on to configuring the condition sets.
8. Use condition sets to control when the form is shown
After adding your form to the deployment, your settings for targeting conditions will open. This is where you define the rules that determine where the form appears, when it is triggered and under which circumstances visitors will see it.
Depending on your setup, you can configure the form to appear:
- only on certain pages
- after a visitor has spent a certain amount of time on the page
- on exit intent
- after a specific level of scroll depth
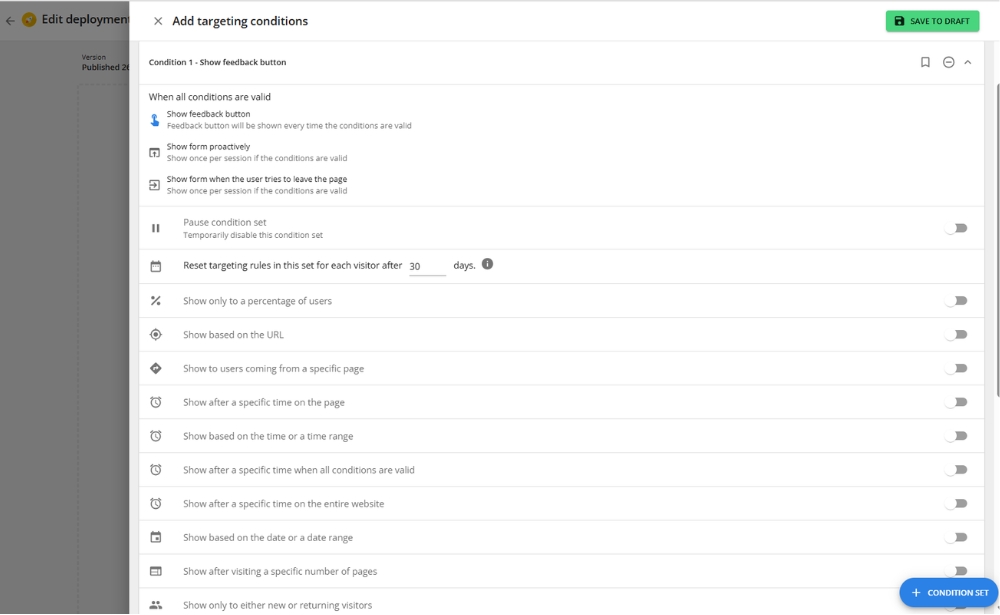
For this example, we want the feedback button to be available across the whole website. That means the condition set should be configured so the form is not restricted to one specific page or one narrow part of the journey.
To set this up, click the condition ‘Show feedback button’ in the condition set. For this example, that is the only condition you need, since the goal is to make the feedback button visible to all visitors across all pages of the website. In other words, there is no need to limit it to a specific URL, page group or audience segment. Once this condition has been selected, click ‘Save to draft’ to store the deployment settings.
After saving the condition set, return to the deployment overview.
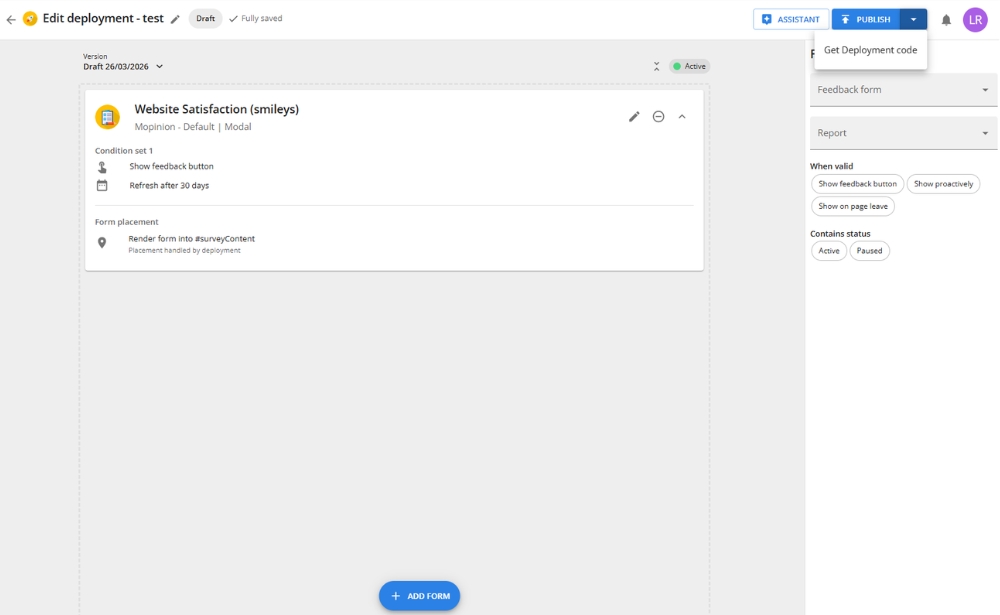
9. Get the deployment code
Before testing and publishing your form, you first need to add a small code snippet to your website. To find it, click the arrow next to ‘Publish’. This will open the option to view the code for that deployment. Copy the code snippet shown there.
Next, add that code to your website. This step is essential because it connects your site to the deployment and allows Mopinion to display the feedback form linked to it. You only need to do this once per deployment.
The exact installation method depends on how your website is set up. For step-by-step instructions, you can follow Mopinion’s knowledge base articles for Deploy Mopinion with a Javascript snippet or installing Mopinion with Google Tag Manager.
Once the code has been installed, return to the deployment. The last step before publishing your form is to test it (if you’d like).
10. Test the form on your website with the Deployment Assistant
Once the form has been added to a deployment, the code has been installed and the condition sets are in place, the next step is to test everything on your website.
A practical way to do this is with the Deployment Assistant. It allows you to preview, test and adjust all feedback forms in a web deployment directly on your website, even if certain triggers or conditions would normally prevent them from appearing.
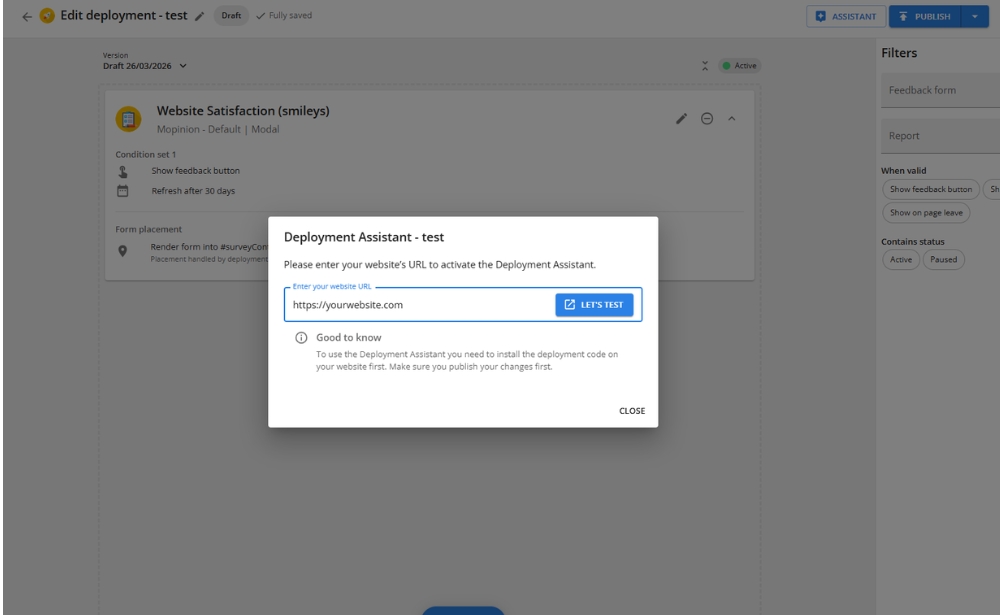
To start testing, open the deployment you want to work on and launch the Deployment Assistant. From there, select the feedback form you want to test.
Once you open the form, you will see an overview of the triggers and conditions linked to it. This is especially useful if the form is not appearing as expected, because the Deployment Assistant shows you which settings are affecting visibility.
If a trigger or condition is preventing the form from appearing to you, the Deployment Assistant will show that.
Conditions and triggers marked with a red dot are the ones stopping the form from being initialised for your current session. That does not necessarily mean something is wrong.
For example, the form may only be configured to appear for a small percentage of visitors, on a certain URL or during a specific time period.
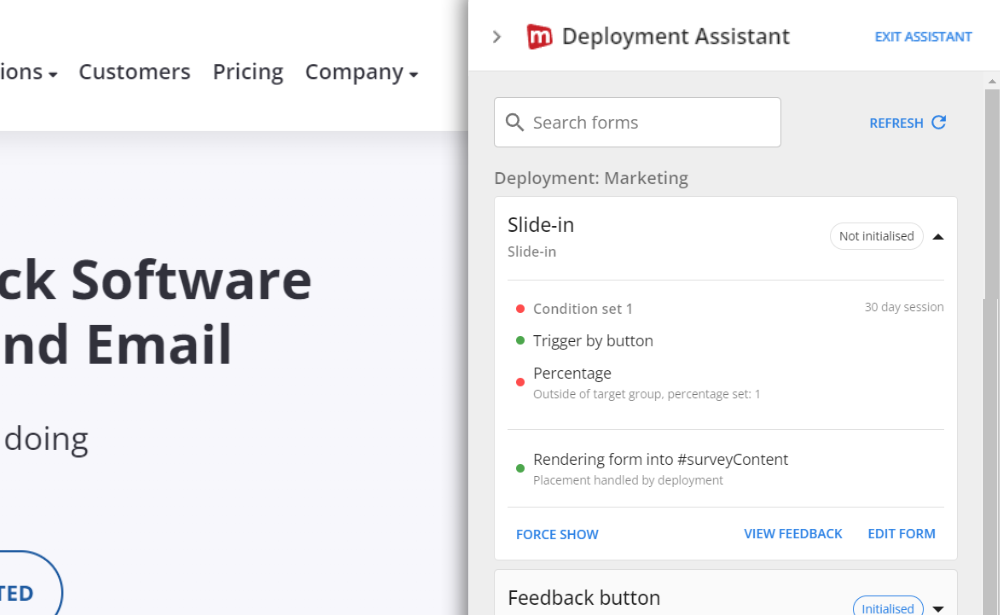
If you still want to test the form anyway, click ‘Force show’. This lets you manually trigger the feedback form on your website, even when it would normally remain hidden because of the conditions or triggers you set. That way, you can still interact with it, review the design and check the full experience in your own environment.
While testing, you can also use the other options available in the Deployment Assistant. ‘Edit form’ opens the form editor in a new tab so you can make changes immediately.
After saving your edits, go back to the Deployment Assistant and click ‘Refresh’ to pull in the most recent version of the form.
There is also a ‘View feedback’ option, which opens the Feedback Inbox filtered to that specific form.
For this example, where we are creating a general feedback button active across all pages, the Deployment Assistant helps you confirm that the form appears where expected and behaves properly on the site. It is also especially useful for making sure the triggers are working.
When testing, check that:
- the form appears on the correct pages
- the feedback button opens correctly
- the questions display properly
- the design looks right on the website
- the experience works well on desktop and mobile view
- the submission flow feels smooth
- the triggers are working as expected

If something is not showing correctly, the Deployment Assistant is one of the easiest ways to understand why. It helps you see whether the form is inactive, whether a condition is too restrictive or whether a trigger is preventing the form from being shown in your current test situation.
It is also worth asking a colleague to test it, since a fresh pair of eyes often catches things you might miss.
11. Publish and start collecting feedback
Once everything has been tested, return to the deployment and click ‘Publish’ to set your feedback form live.
At that point, your feedback form is ready to start collecting responses on your website.
From there, the real value comes from reviewing incoming responses, spotting patterns and turning those insights into improvements. Feedback is most useful when it helps you identify friction, validate issues and improve the digital experience over time.
Start building your website feedback forms
Creating website feedback forms does not have to be complicated, especially when you break the process down into clear steps. With Mopinion, part of Netigate, you can build your form, customise it to match your brand, preview it while designing, create a deployment, install the deployment code, add the form to the deployment, define the condition sets and test everything before publishing.
If you are new to the platform, the best way to start is with one simple use case. Build a basic CSAT, CES or GCR form in a demo account, keep it short, preview it early and test it properly before setting it live.
That way, you are not just adding a form to your website. You are creating a feedback setup that is clearer, more useful and much easier to act on.
Ready to see Mopinion in action?
Want to learn more about Mopinion’s all-in-1 user feedback platform? Don’t be shy and take our software for a spin! Do you prefer it a bit more personal? Just book a demo. One of our feedback pro’s will guide you through the software and answer any questions you may have.